Affiliate Links Disclaimer: This blog post contains affiliate links and I make a small commission off any purchase you make when you click on them.
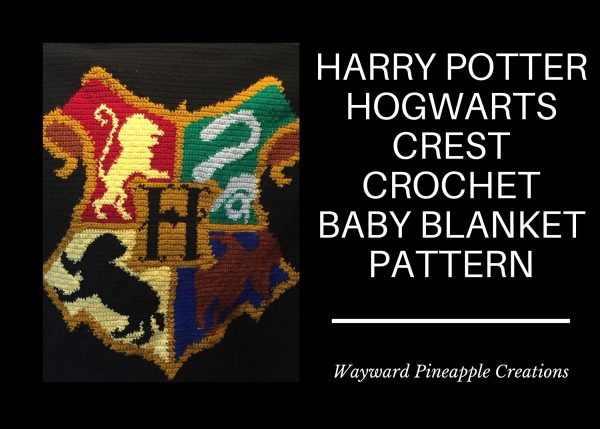
This Harry Potter baby blanket is perfect for the budding witch or wizard in your life! Tucked snugly under this blanket every night, your little one will be ready for Hogwarts in no time.
Read on for more information on my Harry Potter crochet baby blanket, the charts JPG format, and instructions on how to read the charts and construct the blanket. Or click here to skip straight to the charts!
All details below are based on US crochet terms. I made the blanket charts based on crochet, but it works well for knitting too.
Supplies
Worsted weight yarn (Red Heart Super Saver yarn or similar) in the following colours:
Crest/Background: Black, Gold, Brown/Bronze (there isn’t a Red Heart colour that quite fits, but you could use Coffee. I used another brand that had a closer colour, but I don’t remember what it was).
Quilt fabric for backing (black, or whatever you prefer)
Sewing machine to sew on the quilt fabric (or do it by hand if you don’t have a sewing machine)
Notes on Gauge and Finished Dimensions
Finished dimensions of blanket: Approx. 1 metre by 1 metre, and slightly taller than it is wide.
The gauge doesn’t matter other than the fact that a tighter gauge will make a slightly smaller blanket, and vice versa.
How to Assemble and Read the Chart
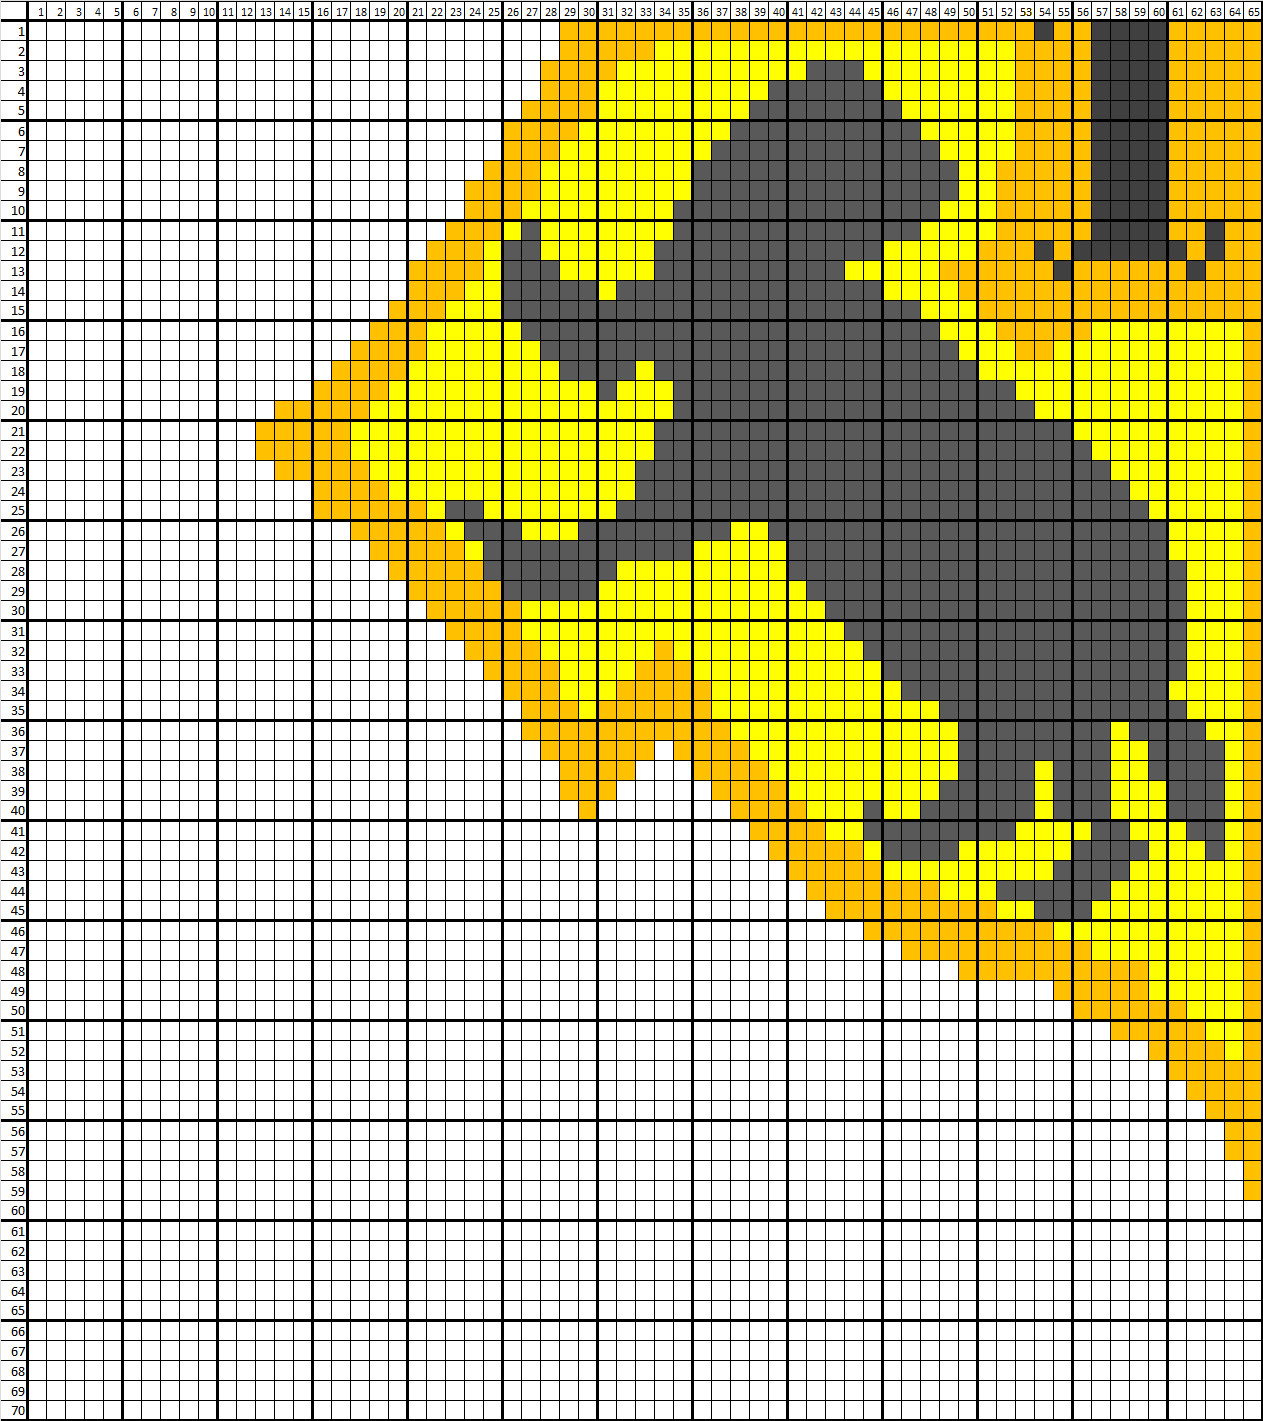
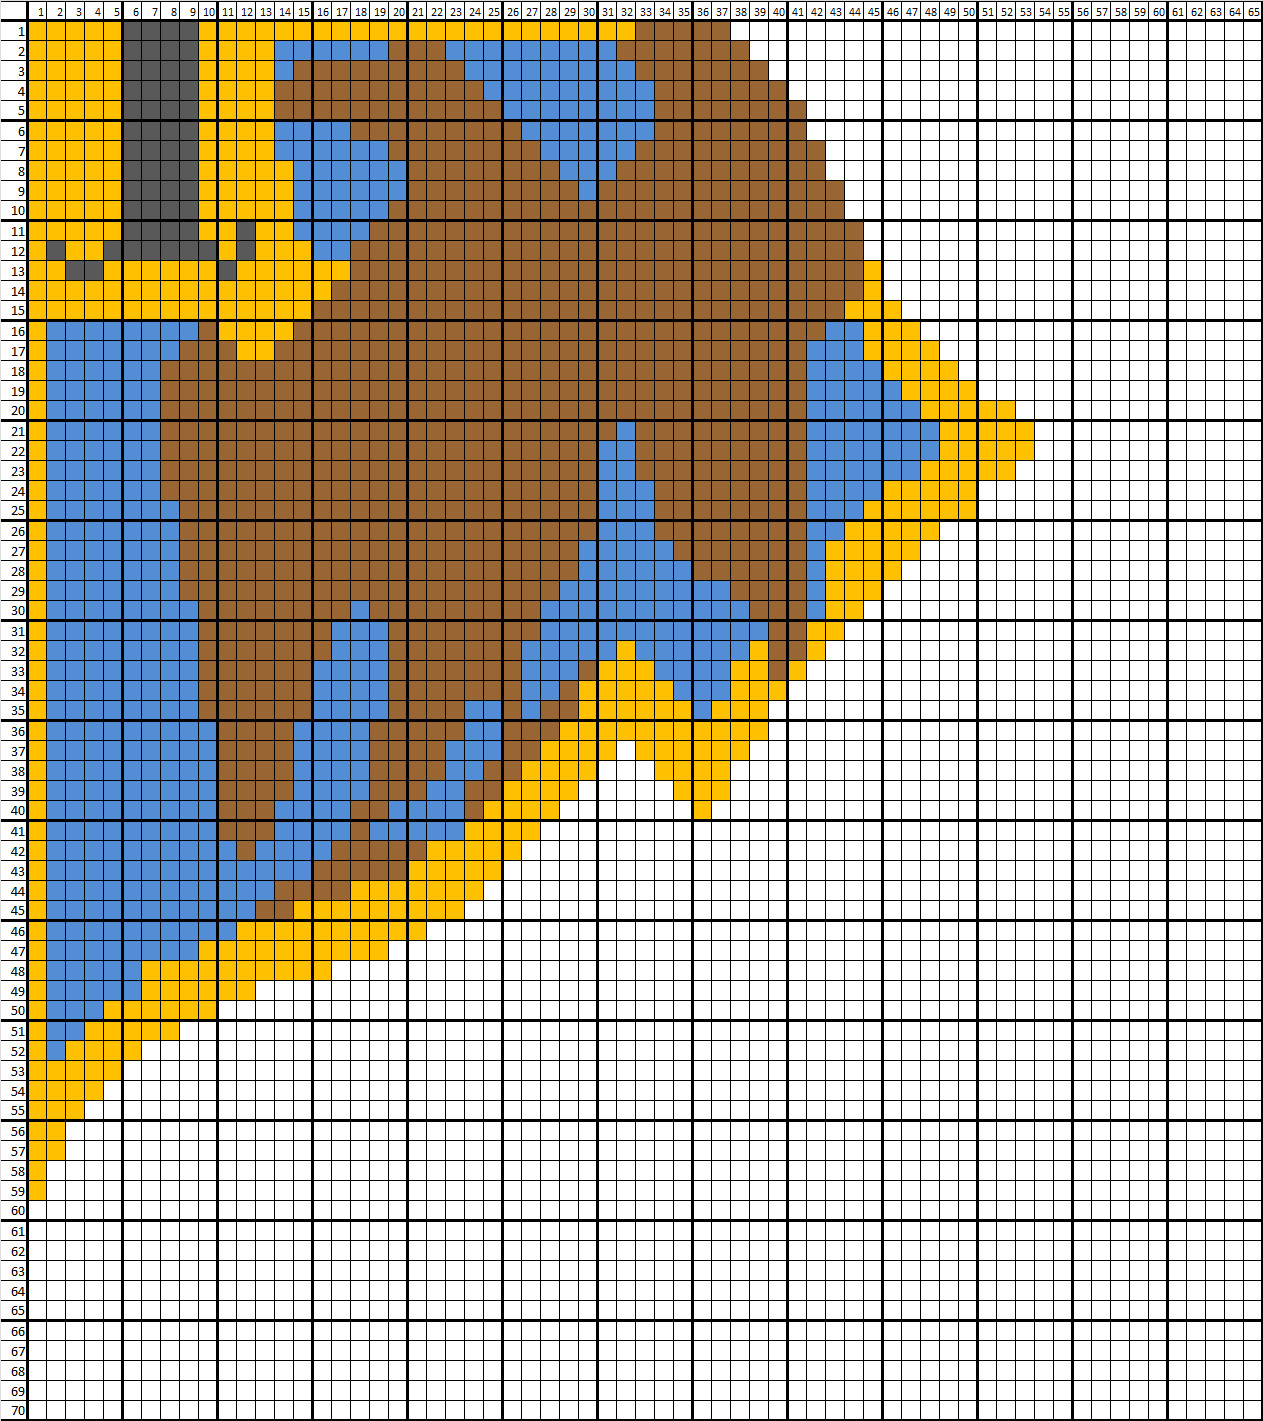
There are four separate chart files, which each needs to be printed and taped together to make one large chart. You will work from right to left and bottom to top, not counting the chain. Each chart is 65 pixels (stitches) across and 70 up, so when taped together the total chart is 130 stitches across and 140 rows tall.
Start by chaining 131 in black, then the first stitch of the first row is the first pixel in the bottom right corner of the chart. One pixel corresponds to one single crochet. For the odd rows you’ll be working from the front, and for the even rows you’ll flip it and be working from the back. Make sure the ends are always hanging to the back/wrong side of the blanket – so sometimes they will be facing you, and other times they will be on the other side from you.
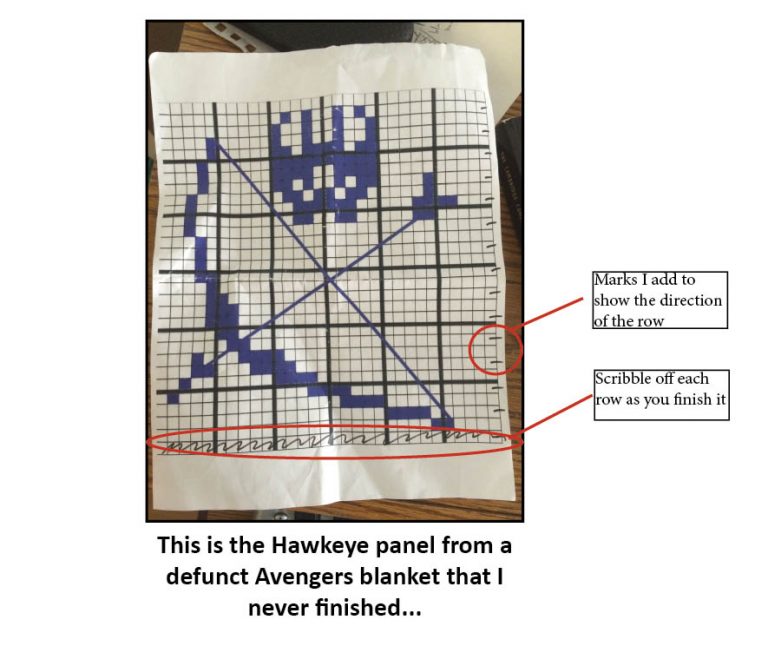
I subdivided each chart into 5×5 boxes since it helps me count my stitches. I like to make a little mark beside each row so I know which direction I’m going, and I cross off/scribble out each row in sharpie as I finish them. Like this:
Notes on Colour Changes
There are various techniques for changing colours, so it really just depends on your preference and whether or not you care about what the back looks like. I’ve detailed a couple of options below, with the pros and cons of each method.
It’s important to crochet tightly so the unused colours don’t bleed through, but personally I find they will still be visible especially when you’re switching between dark and light colours. The other challenge with this blanket is there are many colours, so you will be crocheting over several strands at once! The benefit of this method is that it avoids having to weave in many ends, both the back and the front of the blanket will look clean, and the entire blanket will be a more consistent tension & weight.
Option 2: Carry the second colour behind
Personally, I don’t really like Option 1 because the unused colours always bleed through a bit – or maybe I just crochet too loosely! recommend lining the blanket so it won’t matter what the back looks like. I carry each colour behind as I work, or cut the yarn and pick it up later, depending on how far it would be until I needed it again.
To carry a colour behind, you do the following:
Change to the new colour, and let the old colour fall to the wrong side of the panel. The wrong side may be facing you OR facing away from you, depending on which row you’re on, so be careful! If you only have 3-4 stitches until you need that colour again, just leave it hanging there and then grab it again when you need it. If it’s more than that, you may want to cut the yarn. Alternatively, you can crochet a stitch over the hanging yarn every 3-4 stitches to secure it.
The downside of this method is that the back will have to be lined, you’ll have more ends to weave in, and the tension of the blanket may be a bit wonky.
A final note on colour changes
Due to the nature of crochet stitches there tends to be gaps sometimes between colour changes. I just fill in the gaps after with yarn – often using the yarn ends, since I have to weave those in anyway.
Adding the Border and Blanket Backing
The blanket in the picture doesn’t have a border, but I recommend adding 1-2 rows of a black border just to make the sides look clean. You could also use the house colours or gold for the border, up to you!
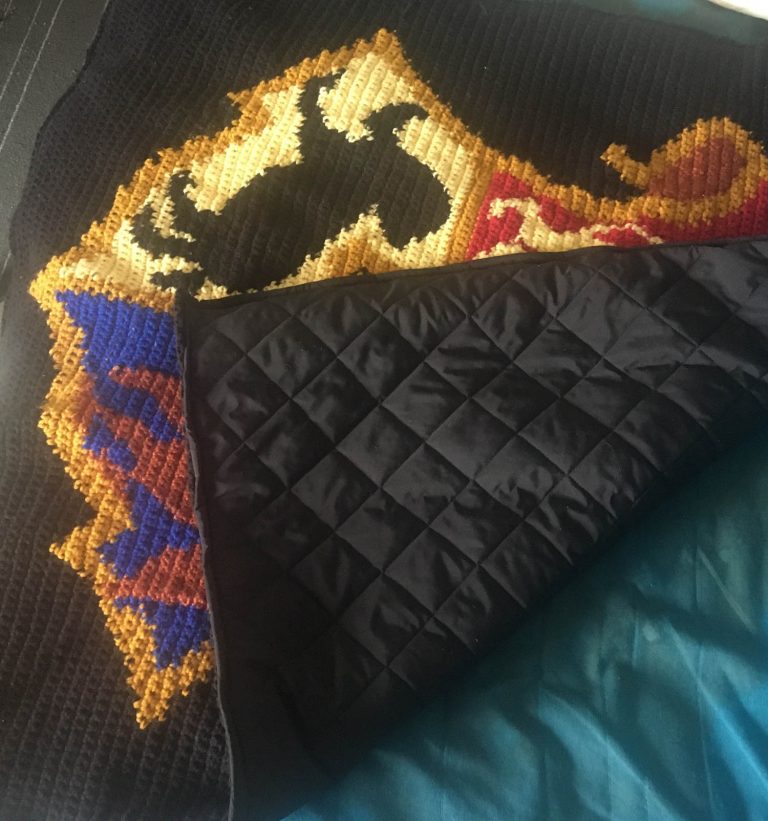
I also recommend backing the blanket in a quilting fabric, which will be soft and light for a baby (and at least one side of the blanket will be easy to clean!). You can hand sew the quilting on if you don’t have a sewing machine, but it will be a time consuming process. If you have a machine then it’s pretty quick and easy to sew the quilting to the blanket all around the edges. Just fold the edges and pin all the way around, then feed it slowly and carefully through the machine. It’s a bit terrifying at first (when I did this with my Game of Thrones blanket, I was convinced that the crochet stitches would get caught in the machine and rip my beloved blanket to pieces), but just be careful and it will be fine.
Join my newsletter and receive your FREE guide to the Five Essential Amigurumi Techniques!
Harry Potter Baby Blanket Charts
Click on the picture or caption to download the charts. Print each one, trim the white off where needed, then tape carefully together so make one big chart. The background is in black, but I’ve left it white so you don’t have to print out all that black!
I hope you enjoy this pattern, and if you have any questions please don’t hesitate to comment below or email me.
And if you made your own Harry Potter baby blanket I would love to see a picture on Instagram! Make sure to tag me so I don’t miss it, @waywardpineapplecreations.
Than you so much for sharing this pattern. I’m working on the edging now and have ordered my quilting fabric for the backing. Did you block the blanket before attaching the backing? Also did you tack the backing to the blanket in any spots? Thanks!!!
Glad to hear you like the pattern! Yes, I would block it before you add the backing, to help it keep the correct shape. For the backing, I would sew it around the edge and then tack it in a few spots to keep it down. If you’re using black fabric & thread then just choose black parts of the blanket so the thread doesn’t show up. 🙂 You could tack it to the back of the ‘H’ in the middle, and perhaps at a few spots around the crest.
Ahh good question! Honestly it was a couple of years ago and the actual blanket wasn’t made by me, I designed the chart and my ex made it. I can’t remember how long it took her – maybe a few weeks? It’s a bit finicky because of all the colour changes, so although it’s not too big each row can take awhile. I’d give yourself at least a few weeks if you have a deadline. 🙂
I’m new to making this type of blanket as opposed to a c2c type. How do you keep the pattern straight? The only time I ever tried to do a graph in this way the picture started going at a slant.
Hmm, that’s a good question, I’ve honestly never had that issue. If you go across each line of the graph (switching directions every row, so working in a zigzag ie right to left, back left to right, etc) then it should turn out correctly. Just make sure to keep track of the rows as you go (I draw a line through them) so you don’t accidentally start working on the wrong row. And make sure as well to count your stitches correctly, so you don’t end up with a lopsided pattern. 🙂 Good luck! Let me know if you’re having issues with it as you work. If it’s coming out wrong and you can show me exactly what’s not working, I might be able to help out. 🙂
Thanks, I’m glad you like it! Unfortunately I don’t have a pattern for a double or queen bed, and it’s not easily alterable. You could try making it with a bulky yarn and a big hook and then adding some extra borders or something? I don’t think it would make it substantially bigger, but you could probably make it couch throw sized at least. 🙂
The crest pattern is in the blog post – if you click on the chart images, the full PDF of each chart will pop up and you can save and print them. 🙂 There are four PDFs, one for each house. They need to be printed separately and taped together. I hope that helps? There are further instructions in the blog post. The crest pattern is sized to make a baby blanket, I don’t have the pattern charted out for alternative items (such as larger blankets, or pillows), sorry.
Hi! 8.5×11 will work fine, yes. It doesn’t really matter, as long as you can see the individual squares easily. 🙂 I printed them on 8.5×11, then you just tape the 4 sheets together.


21 thoughts on “Free Pattern: Harry Potter Hogwarts Crest Crochet Baby Blanket”
Thank you so much for this patern!!
Thank you for your generosity in sharing the pattern for the HP medallion. My DIL was thrilled!
That’s awesome, Mary! I’m glad you (and she) liked it. 🙂
Than you so much for sharing this pattern. I’m working on the edging now and have ordered my quilting fabric for the backing. Did you block the blanket before attaching the backing? Also did you tack the backing to the blanket in any spots? Thanks!!!
Hi Deborah,
Glad to hear you like the pattern! Yes, I would block it before you add the backing, to help it keep the correct shape. For the backing, I would sew it around the edge and then tack it in a few spots to keep it down. If you’re using black fabric & thread then just choose black parts of the blanket so the thread doesn’t show up. 🙂 You could tack it to the back of the ‘H’ in the middle, and perhaps at a few spots around the crest.
-Julia
What kind of stitch is that?
Hi Gisele,
It’s Single Crochet. 🙂
Julia
How long did it take you to make?
Ahh good question! Honestly it was a couple of years ago and the actual blanket wasn’t made by me, I designed the chart and my ex made it. I can’t remember how long it took her – maybe a few weeks? It’s a bit finicky because of all the colour changes, so although it’s not too big each row can take awhile. I’d give yourself at least a few weeks if you have a deadline. 🙂
I’m new to making this type of blanket as opposed to a c2c type. How do you keep the pattern straight? The only time I ever tried to do a graph in this way the picture started going at a slant.
Hi Lisa,
Hmm, that’s a good question, I’ve honestly never had that issue. If you go across each line of the graph (switching directions every row, so working in a zigzag ie right to left, back left to right, etc) then it should turn out correctly. Just make sure to keep track of the rows as you go (I draw a line through them) so you don’t accidentally start working on the wrong row. And make sure as well to count your stitches correctly, so you don’t end up with a lopsided pattern. 🙂 Good luck! Let me know if you’re having issues with it as you work. If it’s coming out wrong and you can show me exactly what’s not working, I might be able to help out. 🙂
Julia
Ok, thank you. I’ll try again lol
Hello, I love this blanket! Was wondering if you have a pattern for a double or queen bed. Or can this pattern be altered?
Thanks, toni
Hi Toni,
Thanks, I’m glad you like it! Unfortunately I don’t have a pattern for a double or queen bed, and it’s not easily alterable. You could try making it with a bulky yarn and a big hook and then adding some extra borders or something? I don’t think it would make it substantially bigger, but you could probably make it couch throw sized at least. 🙂
I want the pattern for the crest I don’t want a blanket ?,.Please send me the patteren for the crest PLEASE!(alicebilbrey52@gmail.com).
Hi Alice,
The crest pattern is in the blog post – if you click on the chart images, the full PDF of each chart will pop up and you can save and print them. 🙂 There are four PDFs, one for each house. They need to be printed separately and taped together. I hope that helps? There are further instructions in the blog post. The crest pattern is sized to make a baby blanket, I don’t have the pattern charted out for alternative items (such as larger blankets, or pillows), sorry.
Thanks,
Julia
Love the blanket. Can you tell me what size you print all 4 sheet out?
Can I print them on a 8.5 by 11?
Thank you for sharing this with us.
Hi! 8.5×11 will work fine, yes. It doesn’t really matter, as long as you can see the individual squares easily. 🙂 I printed them on 8.5×11, then you just tape the 4 sheets together.
This is great! What are the finished measurements?
Hi Erin! Apologies for the delayed response. The finished measurements are approx 1 metre x 1 metre.
-Julia