Affiliate Links Disclaimer: This blog post contains affiliate links and I make a small commission off any purchase you make when you click on them.
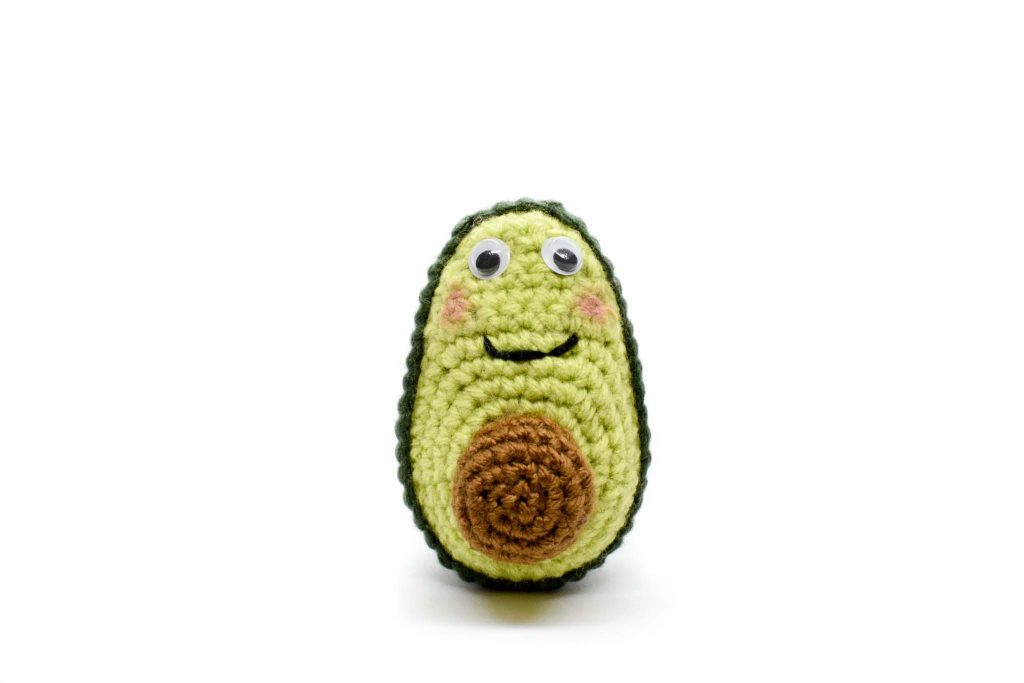
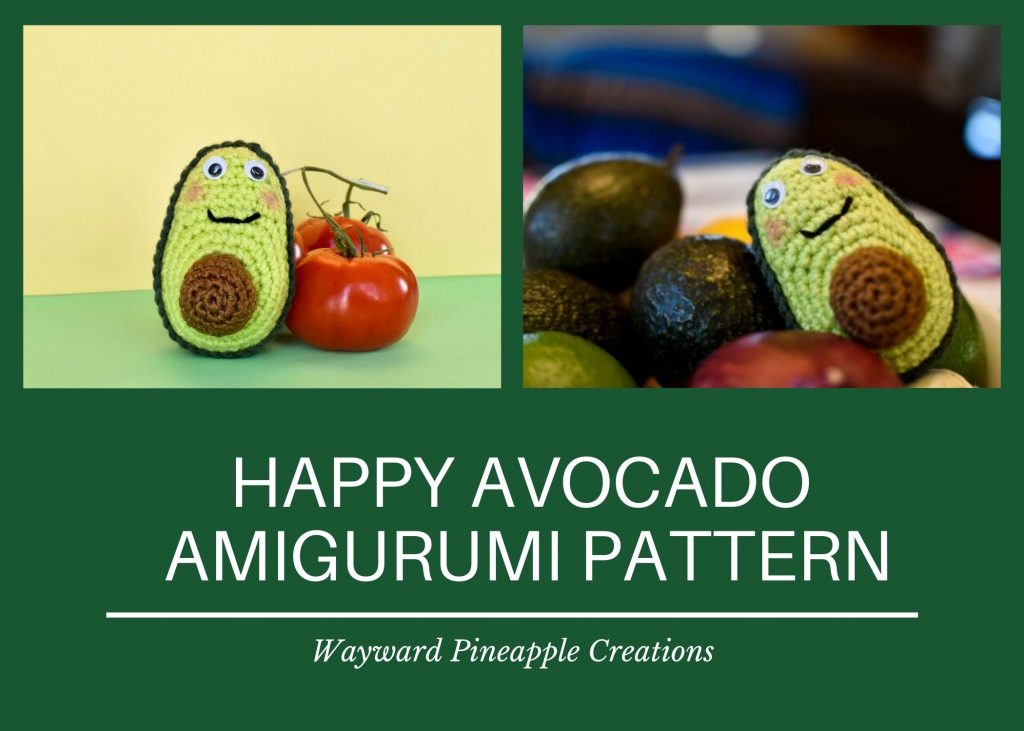
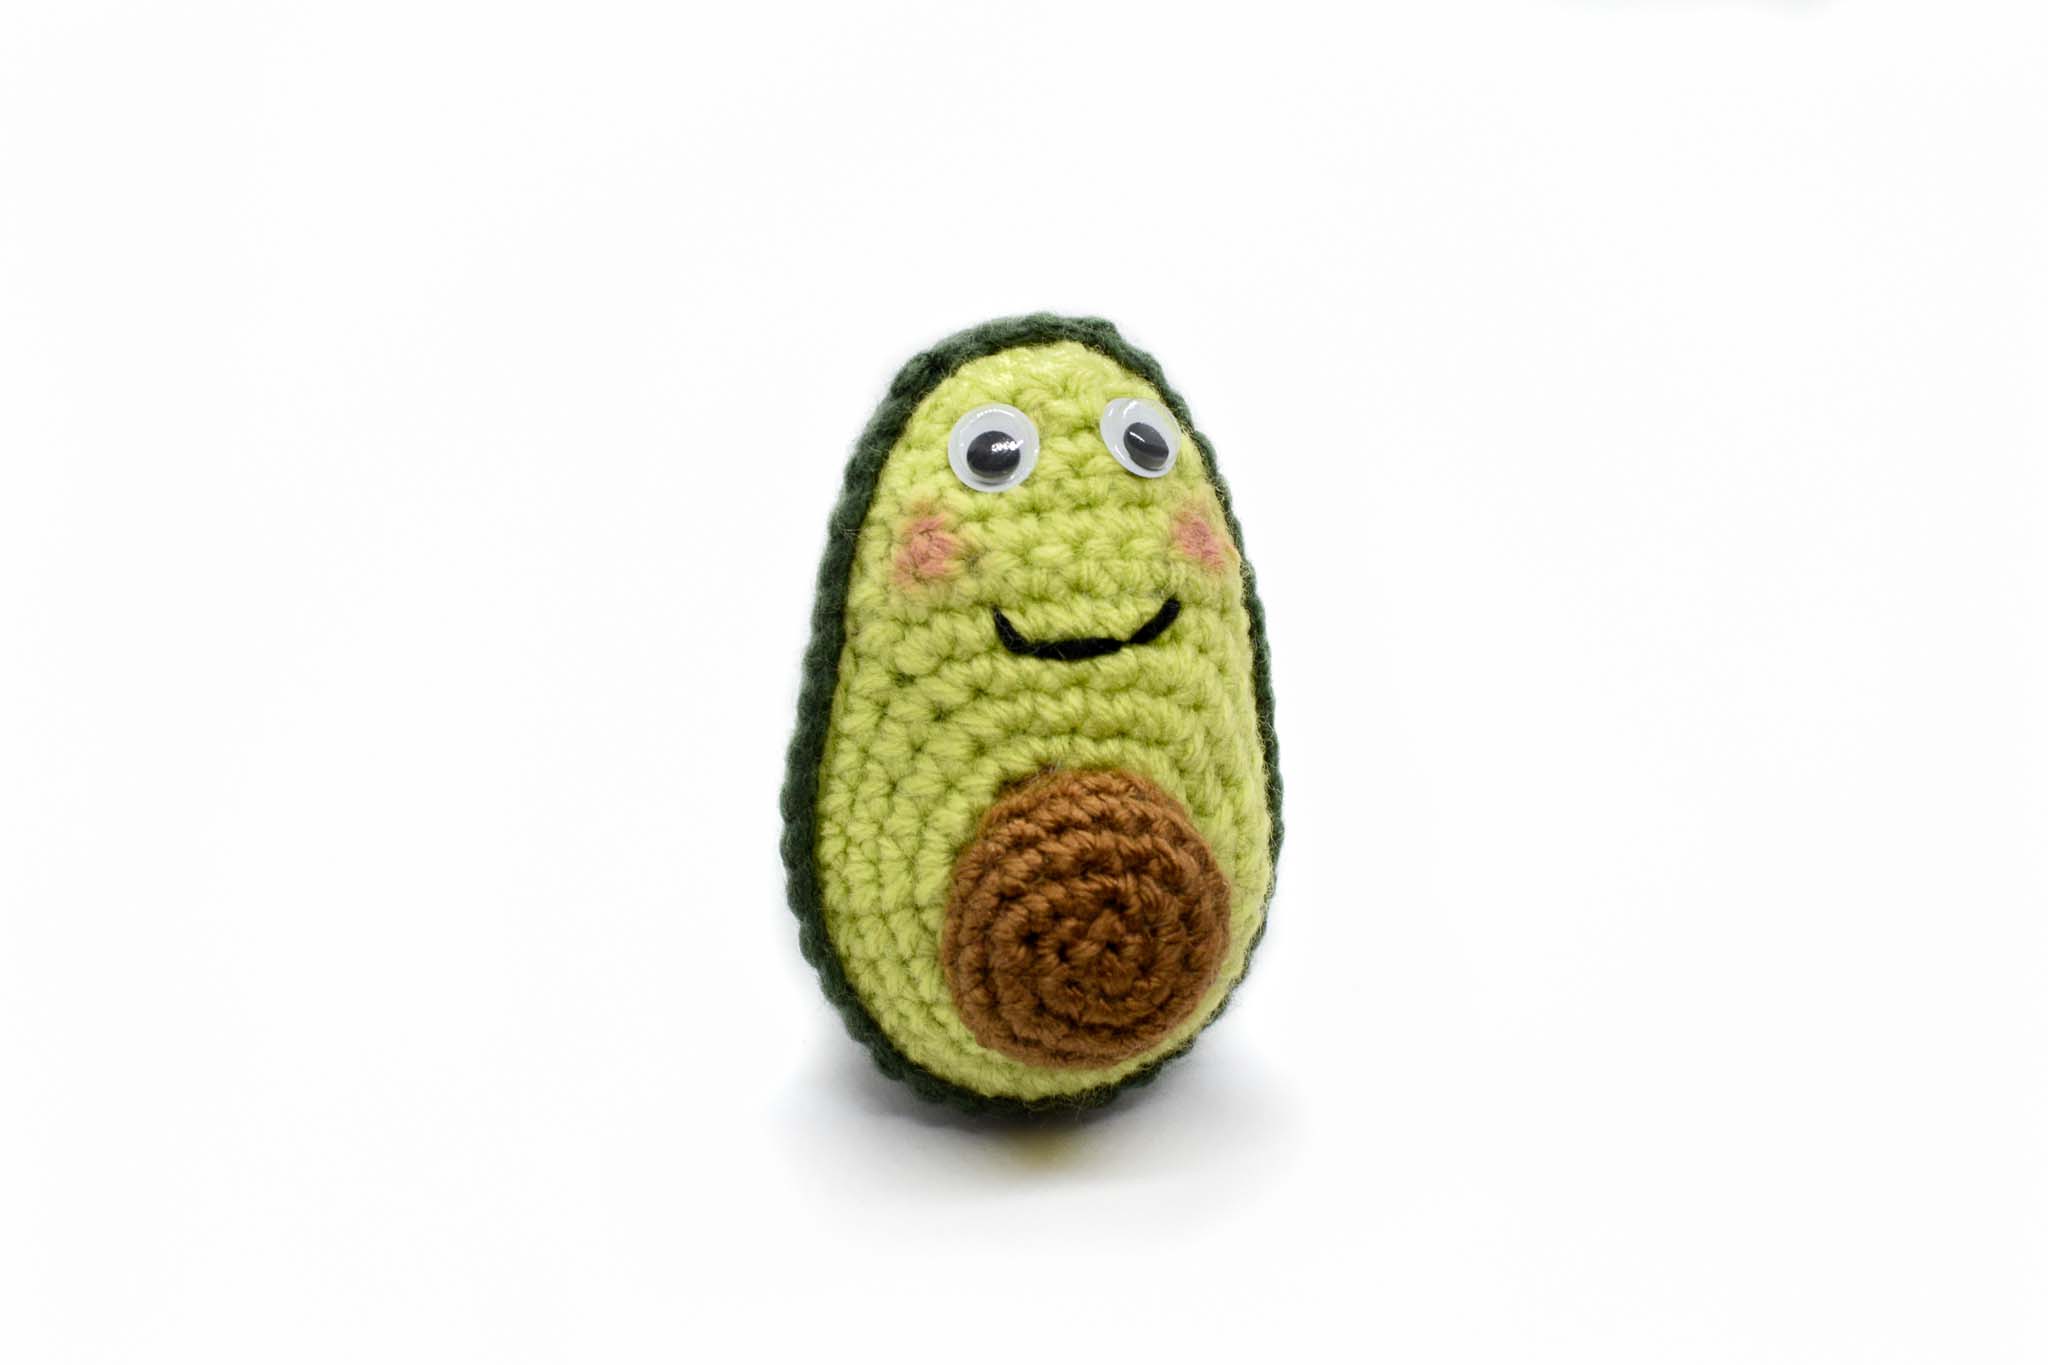
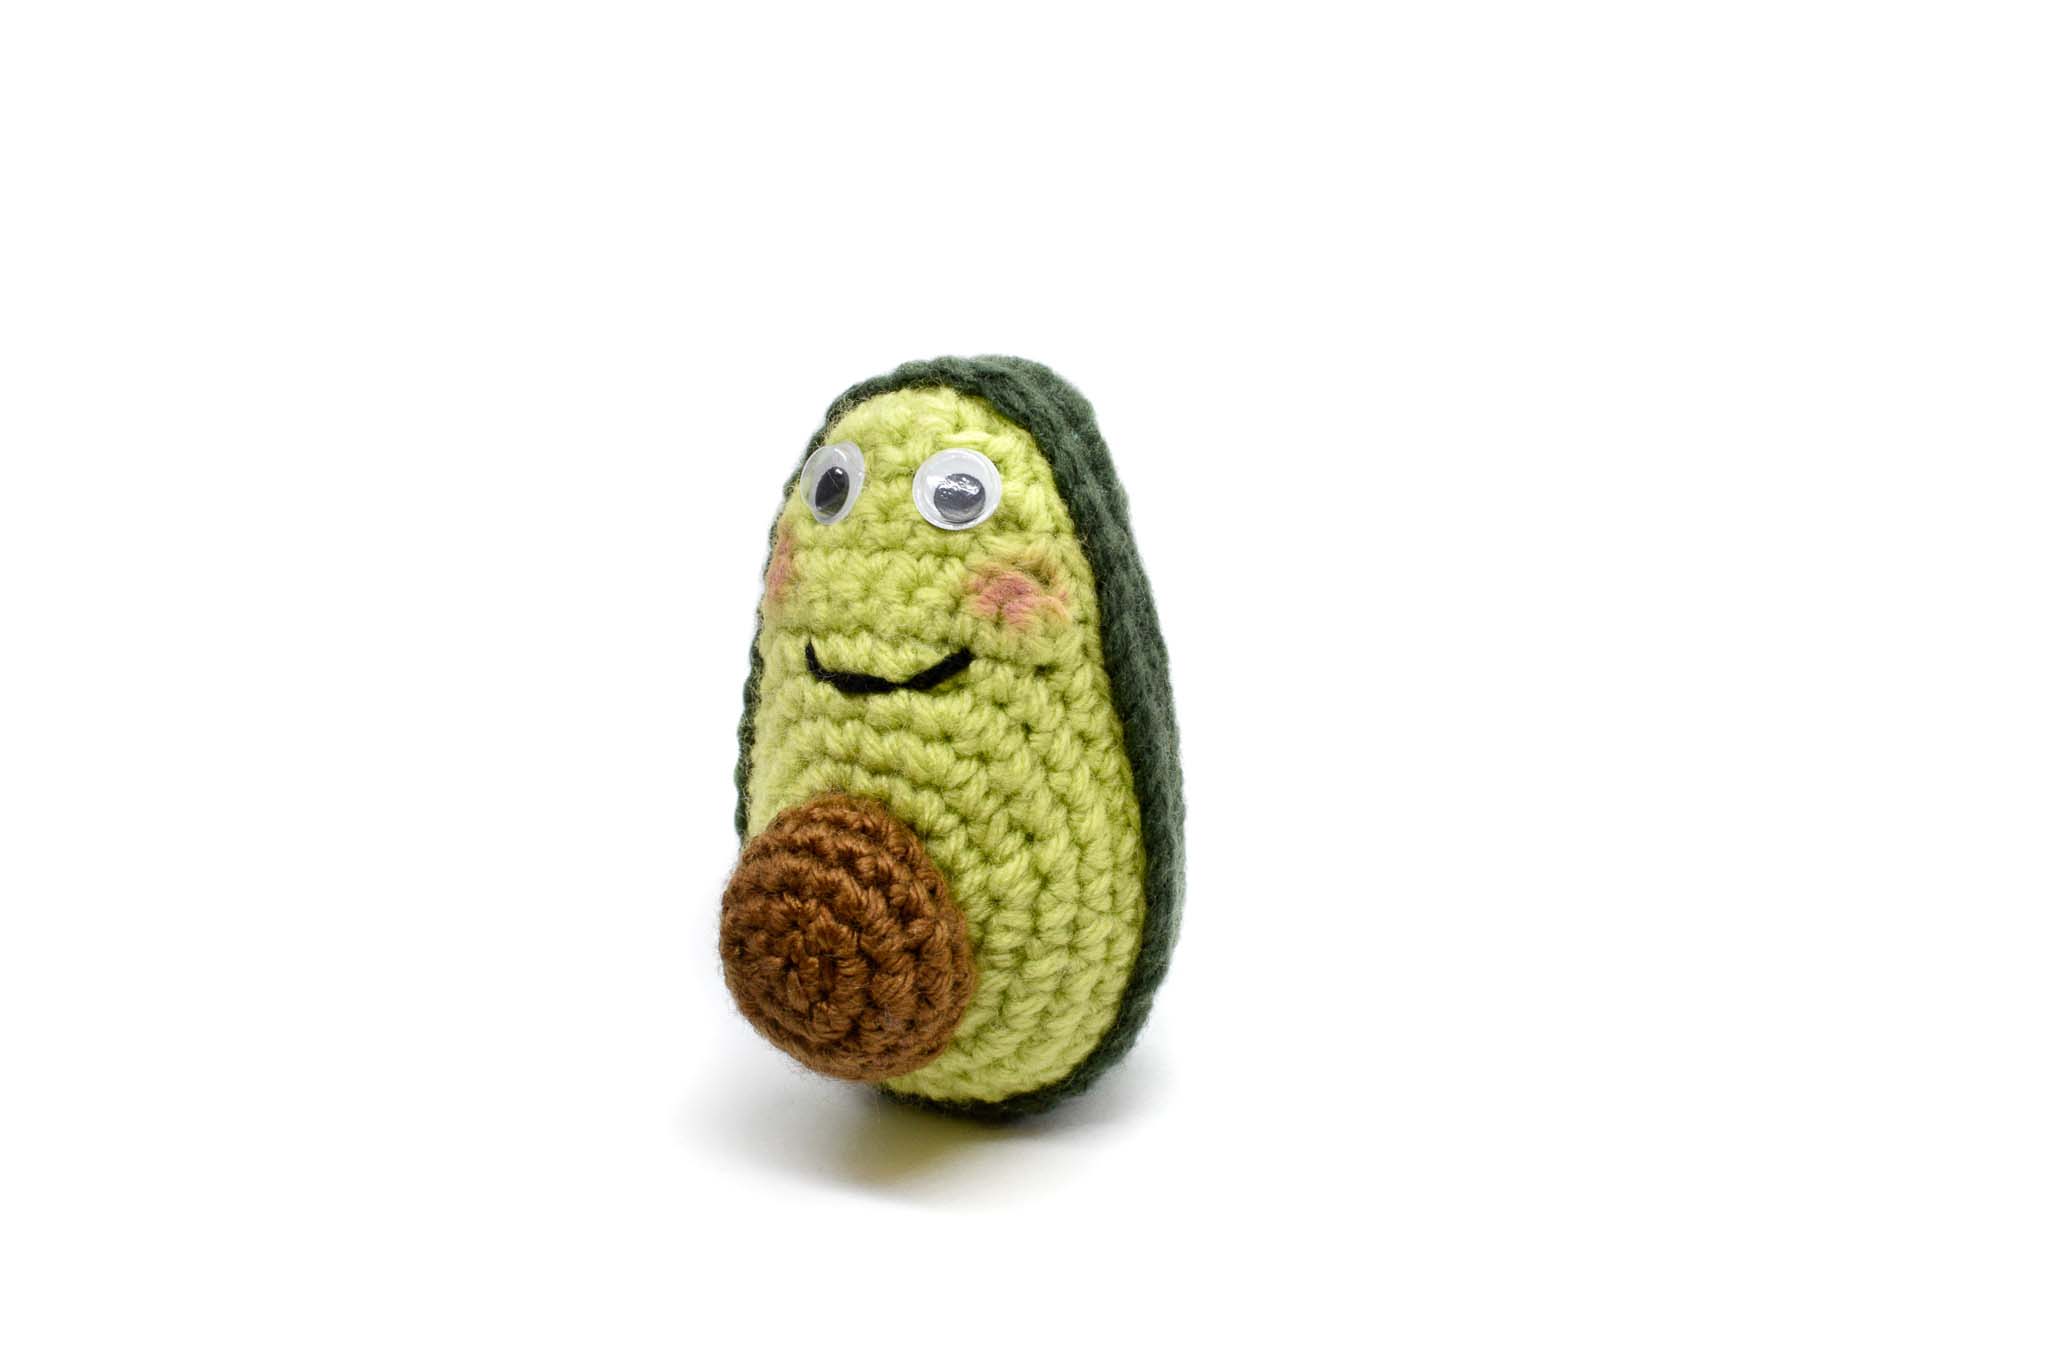
Meet the Happy Avocado! He is the happiest of all the avocados because he knows that, unlike his fellow avocados he will never be cut open, tossed in a blender, and turned into guacamole… yes, life is good for a crochet avocado!
I actually first designed the Happy Avocado a few years ago, during a very short lived project to crochet food from A-Z. I made it halfway through a carrot. Maybe one day I’ll get further down the list, but for now I have an avocado! There is a slightly wonky banana too, which I may release one day if I can figure out how to make him… less wonky.
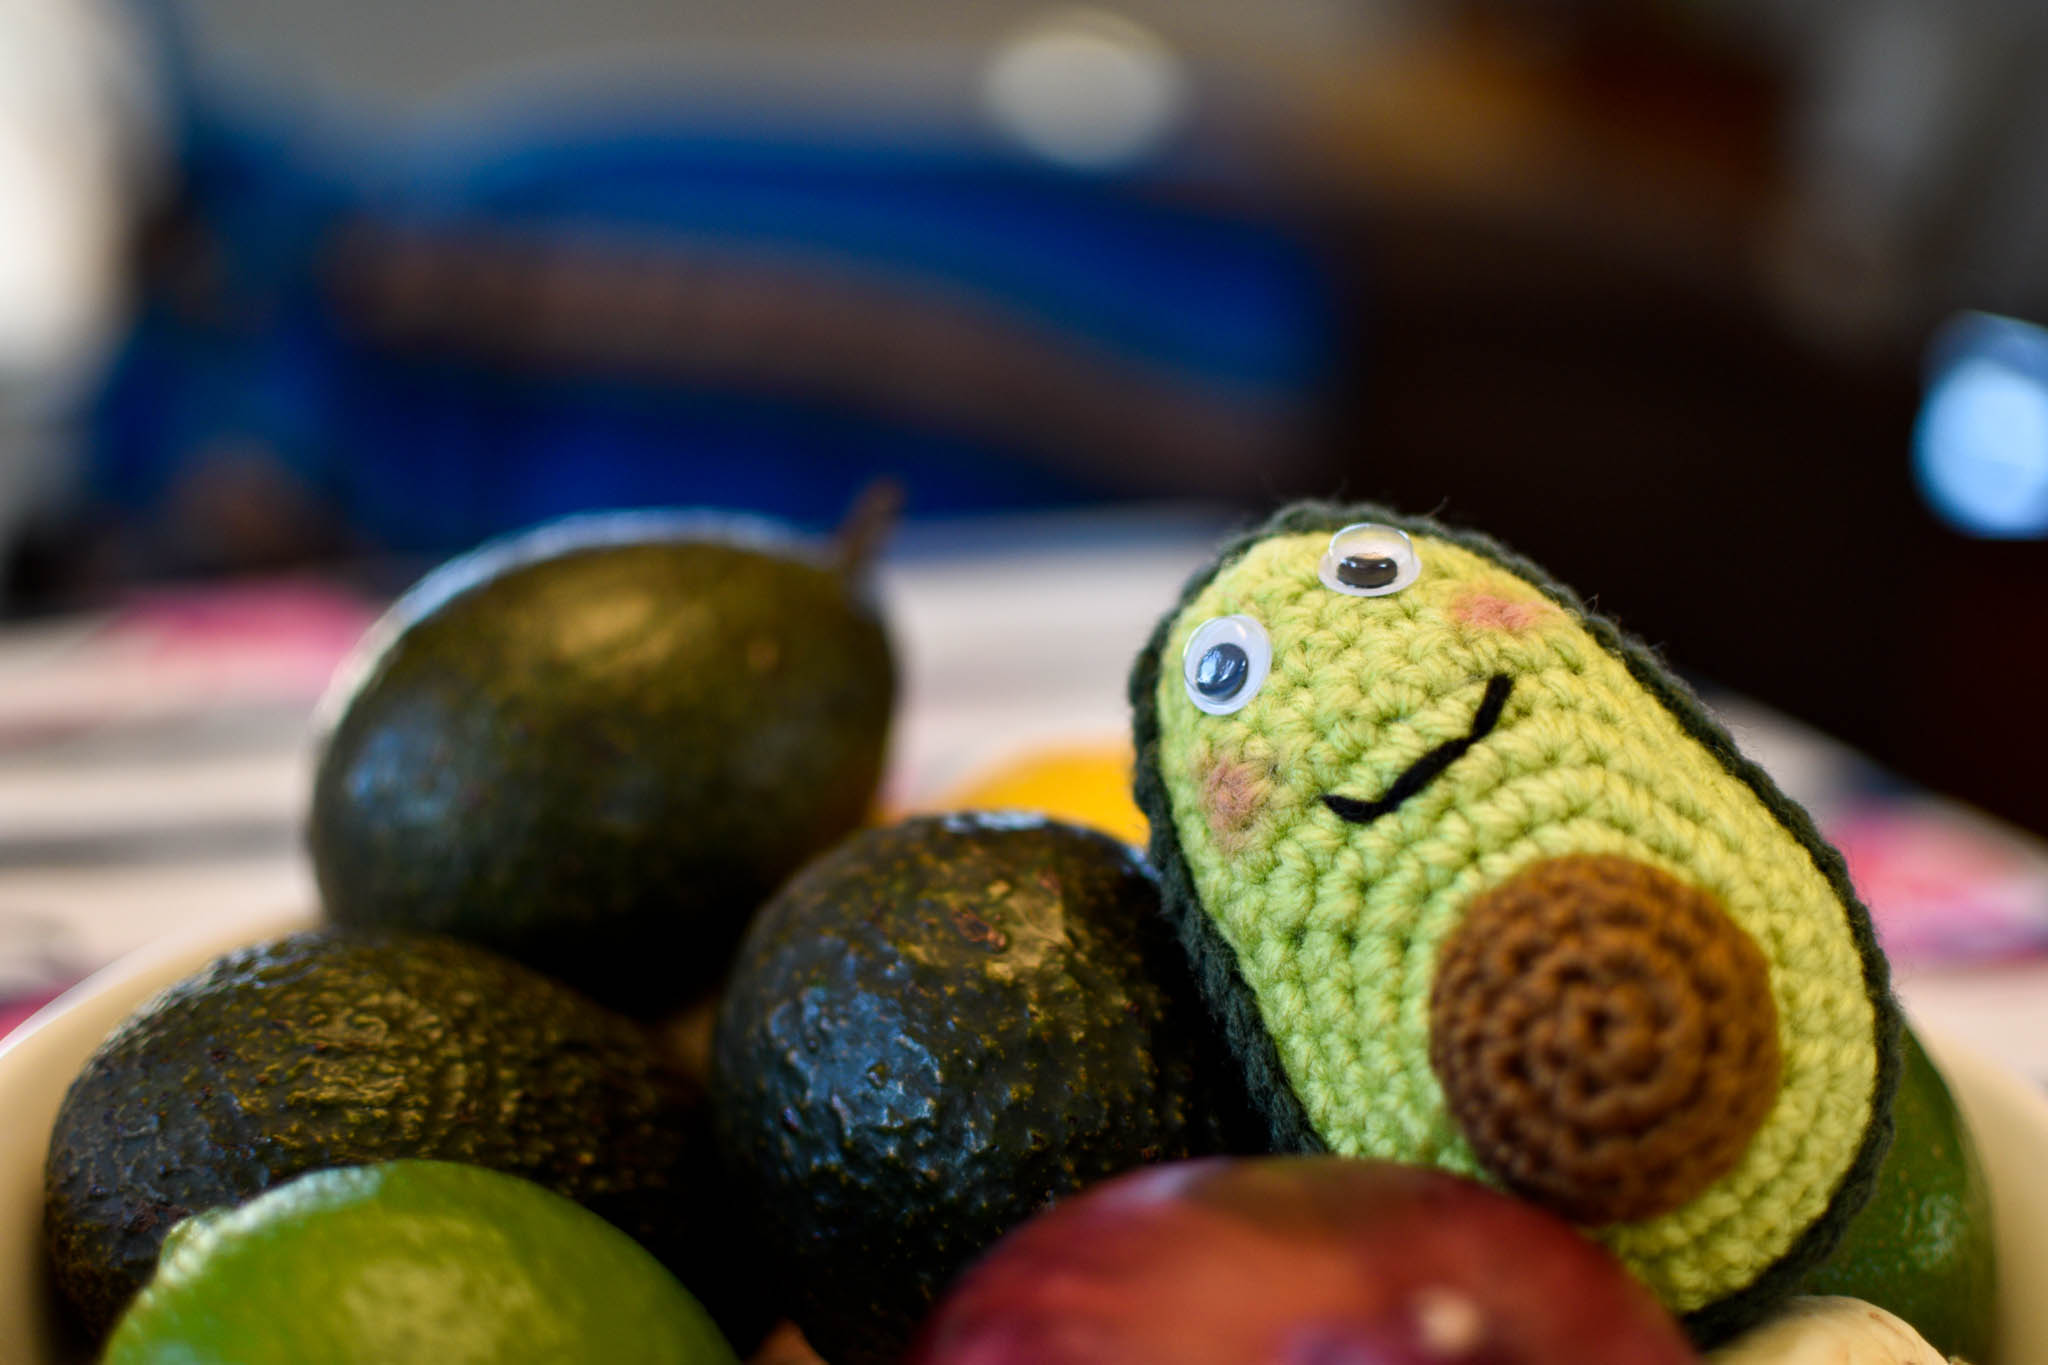
The Happy Avocado is easy to make and would make a fun addition to a child’s kitchen play set. Or put him in a bowl with your real avocados like I did, and let him watch as his friends get chopped into pieces and eaten.
…was that too dark?
Read on to find a list of supplies and techniques needed to make the Happy Avocado Amigurumi, plus links to my Pattern shops where you can purchase the pattern.
Join my newsletter and receive your FREE guide to the Five Essential Amigurumi Techniques!
Download an Ad-Free PDF Copy of the Happy Avocado Amigurumi Pattern
Do you like my Happy Avocado Amigurumi Pattern ? If so, please consider purchasing a copy of the premium PDF version for a small cost. The premium crochet pattern PDF is available for purchase on my website pattern shop, Ravelry, and Etsy, and includes 9 pages of pictures and detailed instructions to make your very own Happy Avocado Amigurumi toy.
Benefits Include:
Ad-free & professionally formatted PDF of the pattern instructions, perfect for printing or downloading to your mobile devices
Extra making-of photos not included in the free version below
In addition to the benefits above, your support will be greatly appreciated and will help me to continue designing and offering patterns to you!
This adorable avocado is the happiest of avocados! Look at him hanging out with his buddies in the food bowl, knowing that unlike his fellow avocados he will never be cut open, tossed in a blender, and turned into guacamole… yes, life is good for a crochet avocado!
Dec: Decrease – I recommend using the Invisible Decrease
FLO: Crochet in front loop only
Pattern Notes
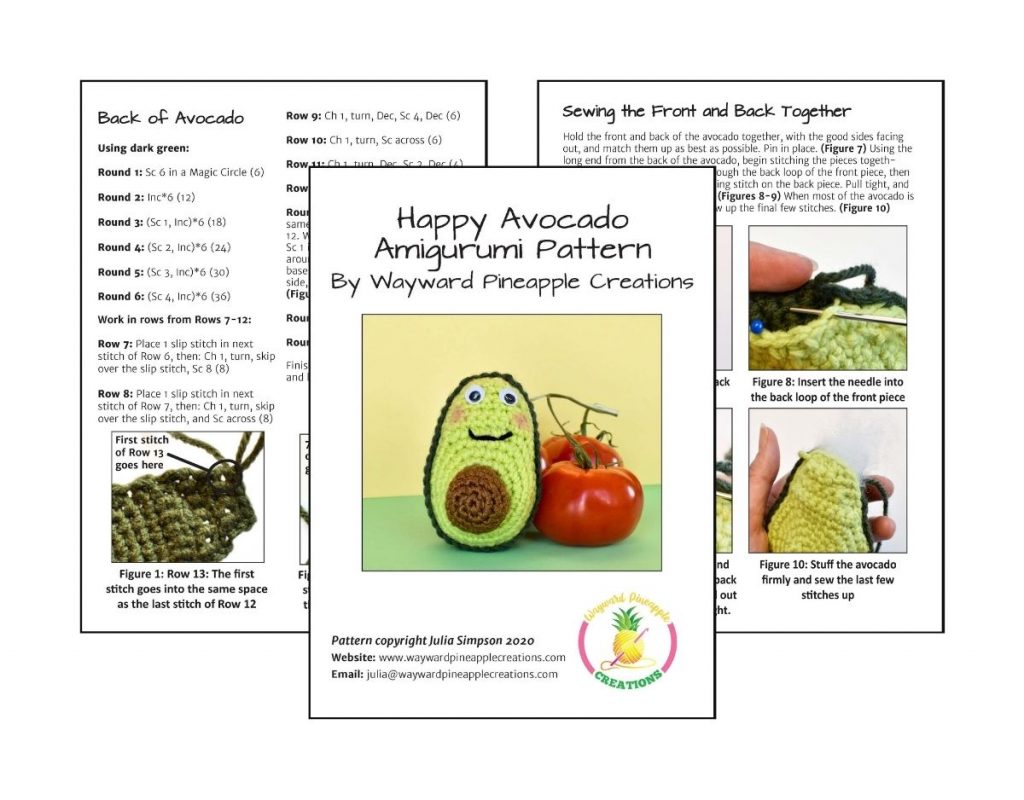
You will first make the avocado’s ‘body’ in two pieces and sew them together. Start each half of the avocado in a continuous spiral. Use a stitch marker and do not join rounds or turn. Starting at Row 7, switch to rows and turn at the end of each row with a Ch 1. You will switch back to rounds in Row 13. The pit is made in continuous rounds and then sewn on separately.
When reading the pattern, (_,_)*x means that you repeat the instructions in the bracket “x” number of times. For example, (Sc 1, Inc)*6 means to repeat (Sc 1, Inc) 6 times. The number in brackets at the end of each row is the total number of stitches you will have when you finish that row.
Pattern Instructions
Back of Avocado
Using dark green:
Round 1: Sc 6 in a Magic Circle (6)
Round 2: Inc*6 (12)
Round 3: (Sc 1, Inc)*6 (18)
Round 4: (Sc 2, Inc)*6 (24)
Round 5: (Sc 3, Inc)*6 (30)
Round 6: (Sc 4, Inc)*6 (36)
Work in rows from Rows 7-12:
Row 7: Place 1 slip stitch in next stitch of Row 6, then: Ch 1, turn, skip over the slip stitch, Sc 8 (8)
Row 8: Place 1 slip stitch in next stitch of Row 7, then: Ch 1, turn, skip over the slip stitch, and Sc across (8)
Row 9: Ch 1, turn, Dec, Sc 4, Dec (6)
Row 10: Ch 1, turn, Sc across (6)
Row 11: Ch 1, turn, Dec, Sc 2, Dec (4)
Row 12: Ch 1, turn, Sc across (4)
Round 13: Do not turn. Sc 1 into the same place as the last stitch of Row 12. Work Sc 5 down the side, then Sc 1 into the base of the rows. Sc 26 around to the other side. Sc 1 into the base of the other side, Sc 6 up the side, then Dec*2 across the top. (42)
Round 14: Sc around (42)
Round 15: Sc around (42)
Finish off, leaving a very long tail.
Front of Avocado
The front of the avocado is made the same way as the back, but without the last two rounds.
Using light green:
Round 1: Sc 6 in a Magic Circle (6)
Round 2: Inc*6 (12)
Round 3: (Sc 1, Inc)*6 (18)
Round 4: (Sc 2, Inc)*6 (24)
Round 5: (Sc 3, Inc)*6 (30)
Round 6: (Sc 4, Inc)*6 (36)
Work in rows from Rows 7-12:
Row 7: Place 1 slip stitch in next stitch of Row 6, then: Ch 1, turn, skip over the slip stitch, Sc 8 (8)
Row 8: Place 1 slip stitch in next stitch of Row 7, then: Ch 1, turn, skip over the slip stitch, and Sc across (8)
Row 9: Ch 1, turn, Dec, Sc 4, Dec (6)
Row 10: Ch 1, turn, Sc across (6)
Row 11: Ch 1, turn, Dec, Sc 2, Dec (4)
Row 12: Ch 1, turn, Sc across (4)
Round 13: Do not turn. Sc 1 into the same place as the last stitch of Row 12. Work Sc 5 down the side, then Sc 1 into the base of the rows. Sc 26 around to the other side. Sc 1 into the base of the other side, Sc 6 up the side, then Dec*2 across the top. (42)
Finish off and weave in ends.
Back of Avocado
Front of Avocado
Sewing the Front and Back Together
Hold the front and back of the avocado together, with the good sides facing out, and match them up as best as possible. Pin in place. Using the long end from the back of the avocado, begin stitching the pieces together as follows: Insert the needle through the back loop of the front piece, then around the post of the corresponding stitch on the back piece. Pull tight, and repeat on the next set of stitches. When most of the avocado is sewn together, stuff firmly and sew up the final few stitches.
Pin the front and back together
Insert needle into the back loop of the front piece, then around the post of the stitch on the back piece (from front to back and out front again). Pull stitches tight.
Adding a Ridge Around the Avocado
Using dark green:
Join the yarn in one of the front loops of the back piece of the avocado. You can attach it anywhere around the avocado, it doesn’t matter. You’ll want to crochet the ridge quite tightly, so it doesn’t stick up too far but still adds some depth to the avocado.
Round 1: FLO – Sc around (42)
When you’ve gone all the way around, finish off and weave in all ends.
Join dark green yarn to the front loop of the back piece of the avocado
Avocado Pit
Using brown:
Round 1: Sc 6 in a Magic Circle (6)
Round 2: Inc*6 (12)
Round 3: (Sc 1, Inc)*6 (18)
Round 4: Sc around (18)
Round 5: Sc around (18)
Finish off, leaving a long end.
Pin the pit to the front of the avocado, centering it over the spiral shape of the rounds as best as possible. Sew the pit to the avocado, adding stuffing as you go.
Adding the Face
Take a length of black yarn and stitch on the mouth as shown. Glue on the googly eyes.
To add the pink blush onto the cheeks I used a Q-tip. Pick up some blush with the Q-tip and apply a small amount to the cheeks, using the Q-tip to spread it around and blend it in.
I hope you enjoy this pattern, and if you have any questions please don’t hesitate to comment below or email me.
And if you made your own Happy Avocado I would love to see a picture on Instagram! Make sure to tag me so I don’t miss it, @waywardpineapplecreations.