Share on facebook
Share on twitter
Share on pinterest
Share on email
Organize Your Yarn with this Awesome Pegboard Yarn & Craft Wall!
-
Julia Simpson
- February 17, 2021

Affiliate Links Disclaimer: This blog post contains affiliate links and I make a small commission off any purchase you make when you click on them.
Is your yarn stash out of control? Have your once neat-and-tidy baskets of yarn turned into giant tangled messes? Or perhaps you’ve just moved into a new teensy, tiny apartment and you’re looking to maximize your storage space wherever you can.
If you raised your hand to any of the above (or all three), I feel you! Not long ago, my yarn stash was definitely a tangled mess. Therefore, in January when I moved into a much smaller apartment, I decided it was time to make a fresh start on my yarn organization.
So off to Pinterest I went…
…and there, in the depths of Pinterest’s craft organization tags, I discovered the splendor that is the YARN WALL!
I’d seen Instagram-worthy pegboards full of craft supplies before, but I’d never seen a yarn wall. And I needed one.
I became instantly obsessed. Every conversation with a friend or family member quickly turned into “I have the most amazing idea! LOOK AT THIS! Isn’t it incredible? I need one!!” as I shoved my phone in their face. I didn’t know how I was going to make a yarn wall for myself, but gosh darn it, I was determined to figure it out.
Between the various blog posts I found on the subject, a helpful guy at Home Depot, and a friend with power tools, I was able to make my dream yarn wall a reality.
Read on for my top reasons why you NEED a yarn wall and then sit back while I walk you through the steps you need to take to build your own yarn wall. It’s not that hard, I promise. All you need is one good sized wall, a few simple supplies, and a couple of power tools. The power tools part tripped me up for a bit because I don’t own any and am unskilled in the ways of the handy-person. But when in doubt, borrow a handy human. You’re bound to know someone who fits the bill.
It’s worth it, I promise. 🙂

Join my newsletter and receive your FREE guide to the Five Essential Amigurumi Techniques!
Four Great Reasons Why You NEED a Yarn & Craft Supplies Pegboard!
You may be thinking, well, this is cool and all, but do I really need a pegboard to organize my yarn and craft supplies? Is a yarn wall going to be too complicated and expensive for me to build? Why make a pegboard when I already have all my yarn stored in tubs?
All valid questions! Ultimately, it depends on your circumstances and preferences, but personally I love my yarn wall. It was the perfect solution for what I needed.
Here are four reasons why a yarn & craft supplies wall might just be the perfect fit for your needs:
1. Your yarn is a tangled mess and just looking at it makes you break into a cold sweat
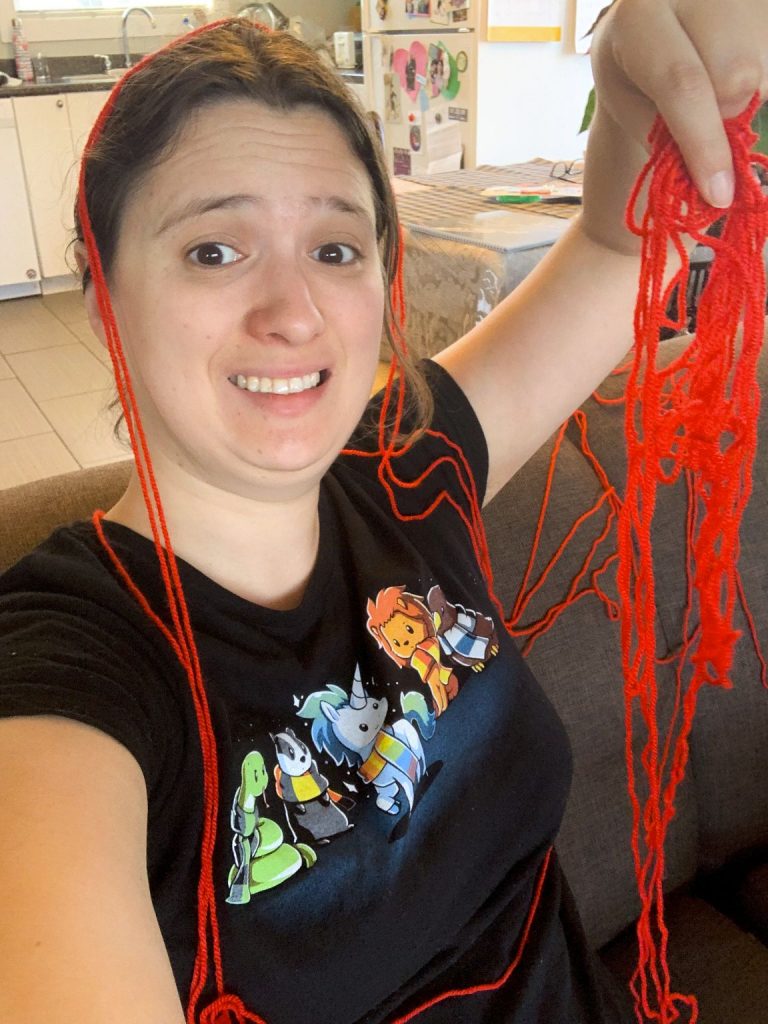
Let’s face it, no matter how organized your yarn stash starts out, it inevitably turns into a giant jumble of yarns that meld so closely together you no longer know where one skein ends and the other skein begins. For years, I stored my yarn in tubs and baskets strewn around my apartment. Every few months, I’d invariably find myself sitting on the floor spending hours methodically untangling and re-organizing my yarn.
But on the yarn wall? Each skein of yarn is kept neatly separated, so no more tangled messes!
Bliss!
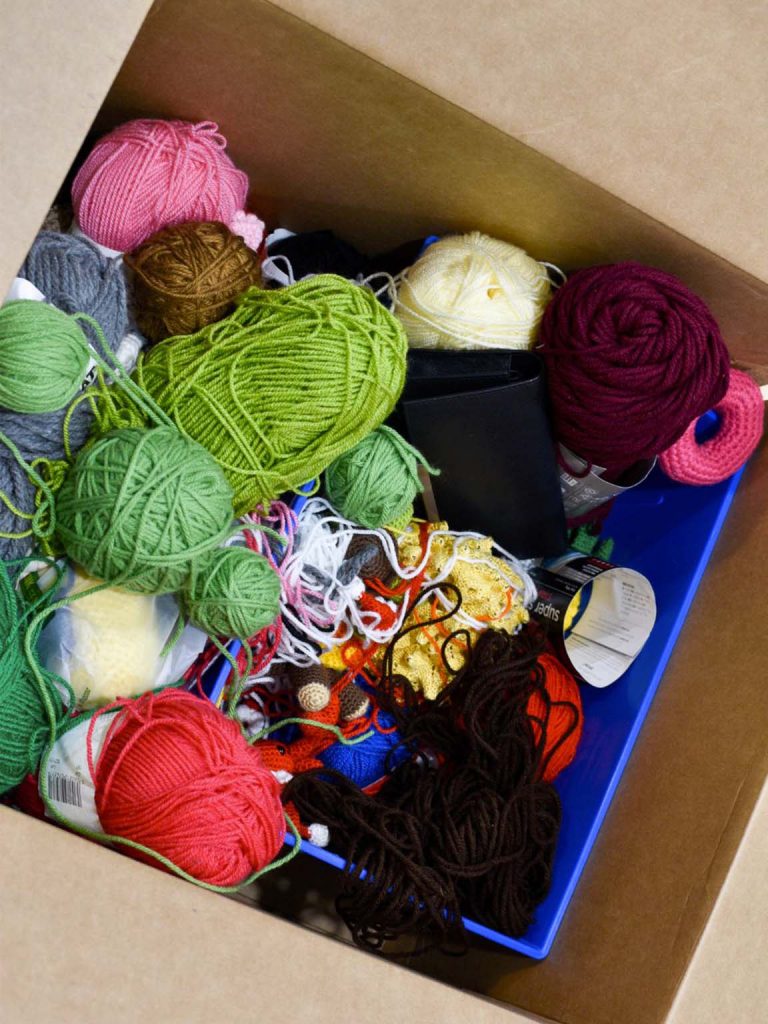
When I moved, I dumped one of my tubs of yarn straight into a box and piled more yarn on top. It was already a mess, so what was the worst that could happen?
This. This is the worst that could happen. Sigh.
2. You’re constantly digging through your stash trying to find a particular yarn, only to realize you’re out of that colour
Even when my yarn was relatively organized and not a tangled mess, it was never easy to figure out how much I had left of a particular colour, or to see what colours I even had. Plus, my yarn was stashed all over my apartment, which didn’t help.
Now that I have my yarn wall, I can see every skein of yarn that I own at a glance, with the exception of some specialty/bigger yarns that I still keep in tubs. I immediately can see, for example, that I’m nearly out of my bright pink worsted yarn. Time to add it to the shopping list!
If I need a yarn, I just walk up to my wall and pull the skein off its peg, and then (and this is the crucial part), after I’m done using the yarn, I put it straight back. If I don’t, the whole system breaks down. 😉 But I must say, having this lovely yarn wall makes me so much more inclined to keep it nice – plus I know where the yarn belongs.
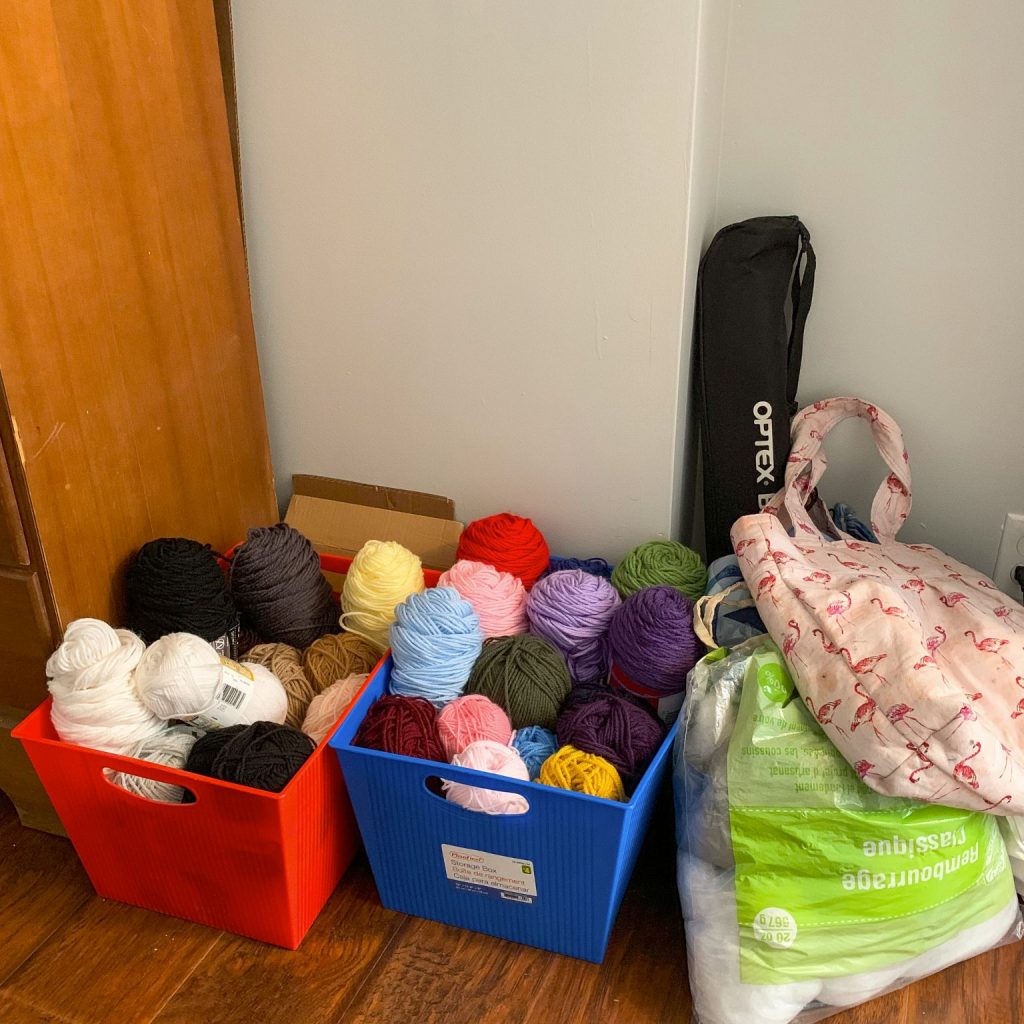
Previous tub storage wasn’t awful, but it was too easy to mess up when digging for a colour
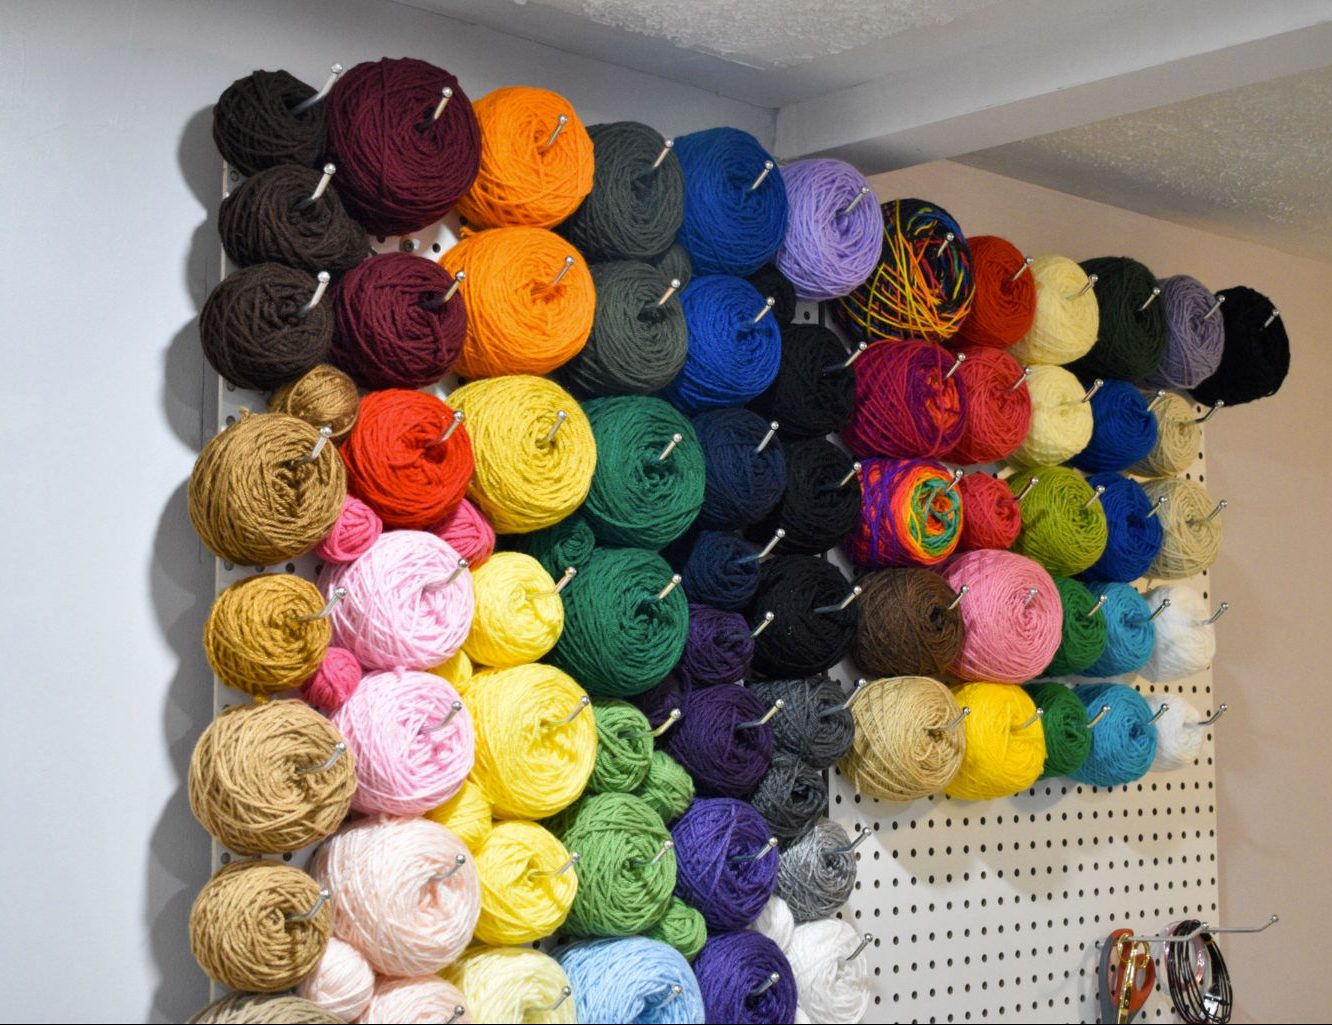
Yarn wall storage: each skein is easily visible and cleanly organized. You’ll never rummage again!
3. You live in a small space and need to maximize your craft storage
I moved into a much smaller place last month, and immediately knew I would have to get creative with my craft storage. Plus, I was honestly so tired of having my yarn shoved into ugly dollar store tubs, and I wanted to find a way to incorporate my supplies into a more aesthetically pleasing display in my new apartment.
If you’re in a similar situation, a yarn wall is a great way to save space. You just need one decent sized wall, a pegboard, a few bits of hardware, and you’re good to go. You can’t put all your craft supplies on the yarn wall, but you can put a decent chunk of them – and it looks cool!
Which brings me to my last point…
4. A yarn wall just looks really, really cool!
I mean look at it. How pretty is that? And I don’t have a huge amount of yarn these days, so if you have tons of different colours, your yarn wall will be even prettier! And, as you can see, I have space left over – so I guess I need to go yarn shopping, huh?
Supplies You'll Need to Build a Yarn Wall
I confess that I was intimidated when I first started planning my yarn wall. I’m not particularly handy, and reading tutorials that involved using lots of power tools overwhelmed me. In the end, building my yarn wall was definitely easier than I thought it would be. However, you will still need some tools or someone in your life who possesses tools.
I’ve listed the various supplies you’ll need below.
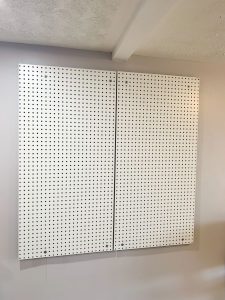
- Pegboard: You can buy large pieces of pegboard at any hardware store such as Home Depot. I got two pieces that were both 2′x4′ and then we mounted them side by side to make a 4′x4′ square. You can also buy a larger piece and ask the hardware store to cut them down. Pegboard is not expensive. I purchased the two pieces I used for about $12 each.
- Spacers: You will need something to create space between the pegboard and the wall, to allow room for the hooks. The spacers should be about an inch wide. Here are some of the things you can use for spacers:
– 2”x1” wood furring strips (necessary if you will be hanging heavy things)
– Special pegboard spacer kits that you can buy online or in a hardware store. I haven’t tried them because the guy at Home Depot didn’t seem to think the spacers in the kits would be strong enough. However, buying a pegboard spacer kit may be the easiest option if you don’t have access to tools and a handy human.
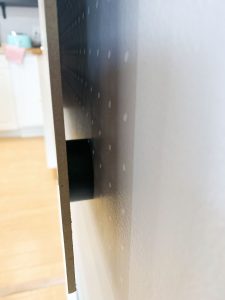
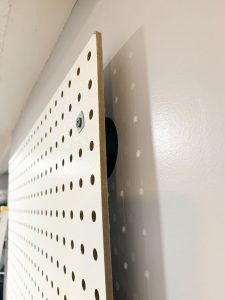
– PVC piping – this is what I bought, at the suggestion of the Home Depot guy. It’s cheap and sufficiently strong if you aren’t putting up anything too heavy. You will need access to a saw to cut the pipe into 1″ thick rings. You can buy a tube of PVC pipe at Home Depot for around $5.
- Drill & screws
- Saw (if you’re using wood furring stripes or PVC piping)
- Level
- Stud finder
- Measuring tape
- Hooks: I purchased this box of 50 x 4″ pegboard hooks on Amazon and ended up needing another box. Pro tip: You probably have more yarn than you realize, and will need more hooks than you realize.
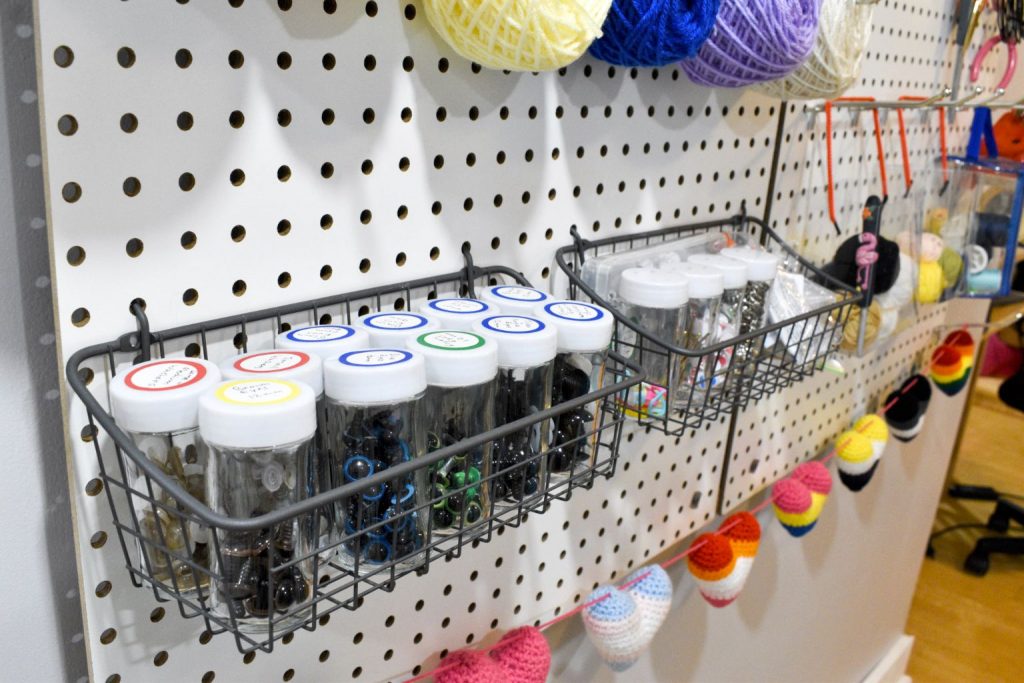
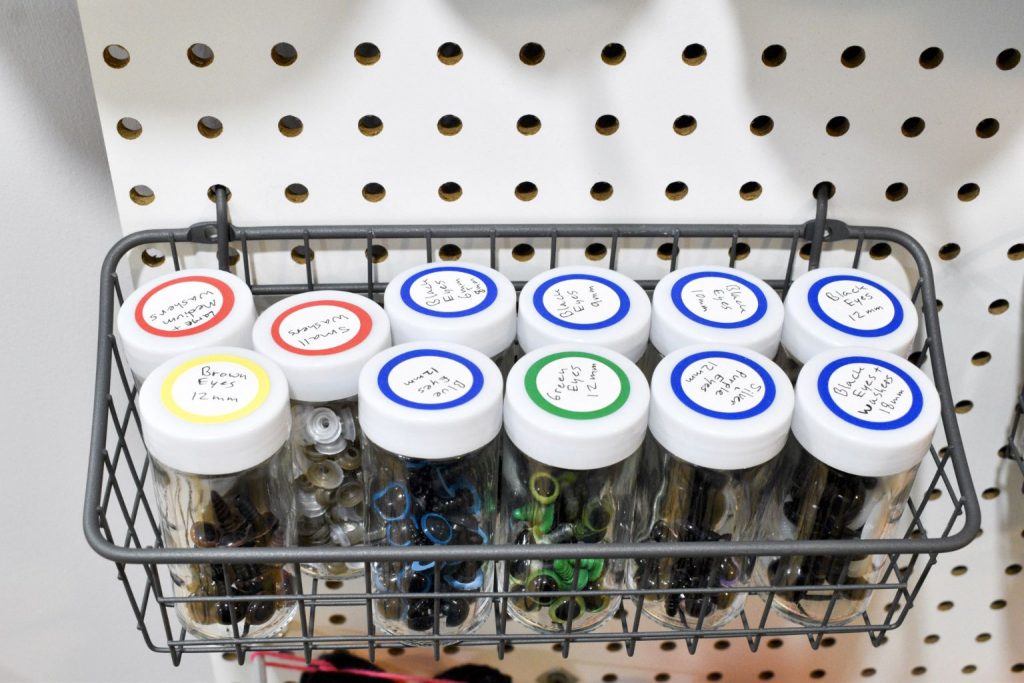
- Other accessories: I purchased two of these pegboard baskets, and a few packages of cheap spice jars at the dollar store to hold my safety eyes.
- Yarn winder: I bought this yarn winder on Amazon for about $25 and it worked just fine.
Instructions to Build a Yarn & Craft Pegboard Wall
Step 1: Organize and wind your yarn
I spent about a week organizing and winding my yarn using a cheap yarn winder from Amazon. The yarn winder clamps onto a table and then you turn the handle to wind the yarn. It was easy and very satisfying to watch the massive mess of yarn I’d brought from my previous apartment turn into these delicious yarn cakes!
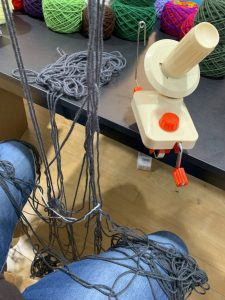
Before: A giant tangle.
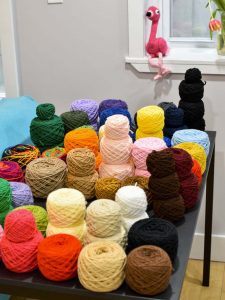
After: Beautifully wound yarn! My flamingo is supervising.
Step 2: Organize your other craft supplies to put on the yarn wall
If you have lots of thread and ribbons and other accessories, you’ll find plenty of cool ideas for how to store them on the internet. Here are a few craft pegboard articles I’ve found that have some awesome suggestions:
How to Make a Giant Peg Board for Craft Organization by Ginger Bowie
Craft Room Pegboard Accessory Ideas by JenniferMaker
How to Organize Your Craft Supplies by Eighteen25
As for me, I mainly wanted to organize my craft eyes so I could get at them easily and not get them mixed up. I also wanted a place to keep my extra stitch markers, yarn needles, and other miscellaneous supplies.
To store the craft eyes and stitch markers/yarn needles, I bought a bunch of cheap spice jars at Dollarama and some round labels for the lids from Staples. I then proceeded to separate all my eyes (and safety eye washers) by colour and size into the labeled jars. I also used one jar for the stitch markers, another jar for the yarn needles, and tossed some keyring supplies into the last few jars I had.
Step 3: Cut the PVC piping (or prepare the spacer type of your choice)
At the advice of the Home Depot guy, I decided to use pieces of a PVC pipe for my spacers.
Using a saw, cut your PVC pipe into several rings that are approximately 1″ thick. For my two boards of 2′x4′ pegboard, we used 8 PVC rings – one for each corner of each pegboard.
If you have a larger pegboard you may need to add spacers in the middle of the pegboard as well in order to support the weight.

Step 4: Mark the placement for your pegboard
Use a stud finder to locate the studs in your chosen wall. You will be placing spacers and screws at each corner of your board (and some in the middle of you have a very large board) so you will need to position the pegboard over the studs. Use a pencil to mark the placement for your pegboard, and check the positioning with a level to make sure the pegboard won’t be uneven.
Step 5: Mount the pegboard
You’ll need a friend for this part.
Have your friend hold the pegboard up to the spots you marked on the wall. Slip one of the spacers between the pegboard and the wall. We started in the upper left corner, then moved to the upper right corner, before doing the bottom two spacers. Keep a hold of the spacer and drill a long screw through one hole in the pegboard, through the ring of the spacer, and into the wall.
You can see the points where we drilled through the pegboard in the pictures below. They’re not exactly at the edges of the pegboard since we had to drill into the studs in the wall.

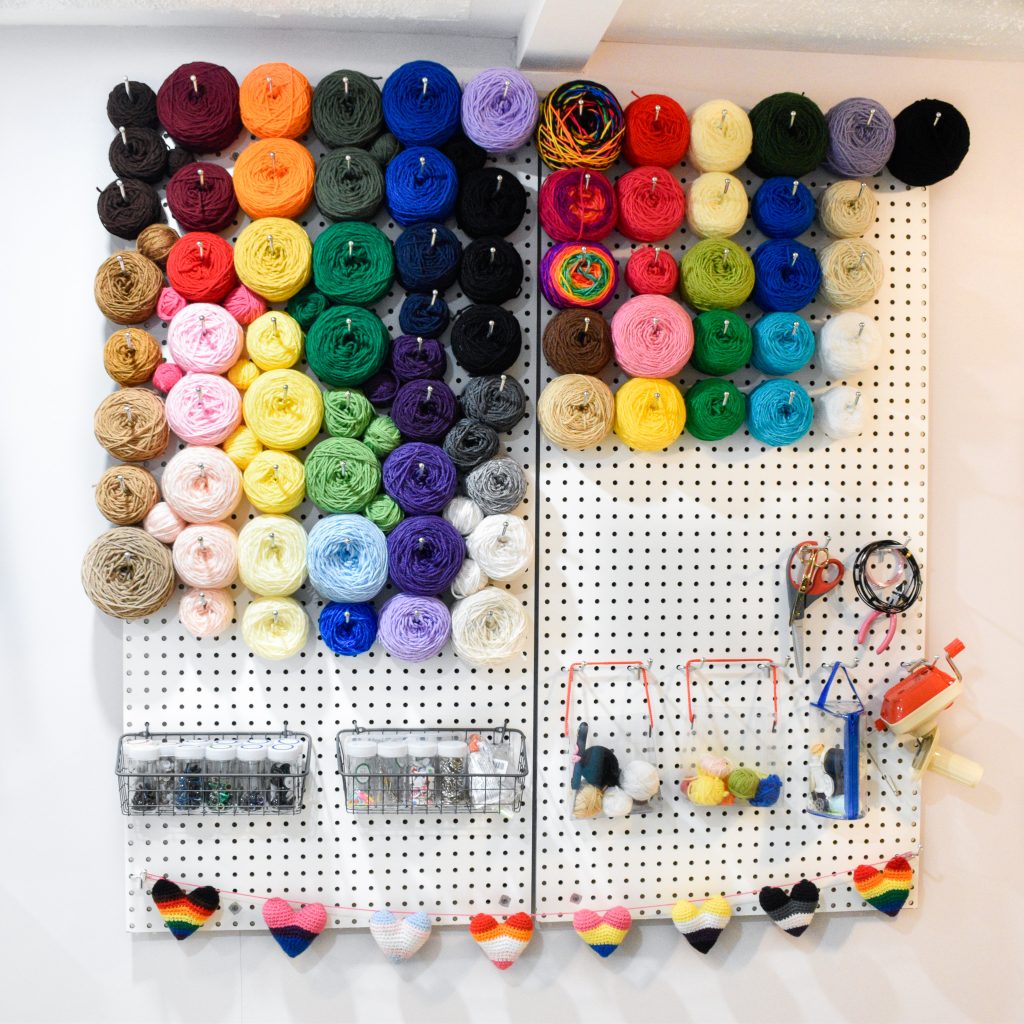
Step 6: Fill your yarn wall with yarn!
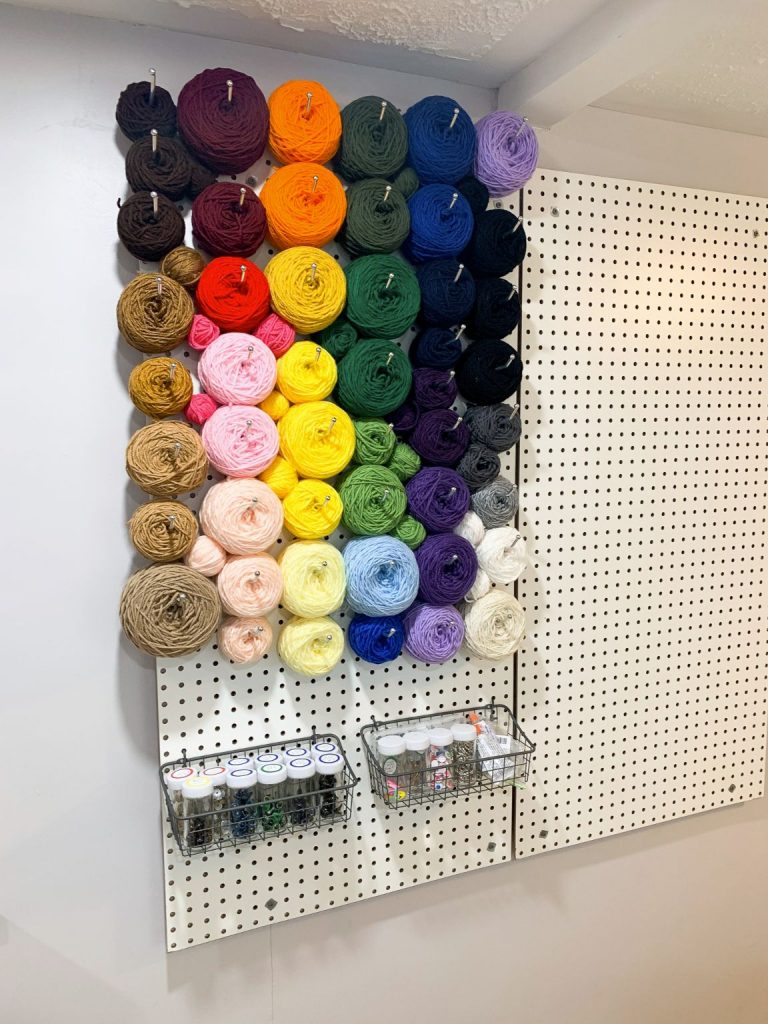
Your yarn wall is ready! Time to bring out the hooks and start putting up your yarn. 🙂 How you choose to organize your yarn wall is up to you. Personally, I have two main types of yarn that I use: worsted weight acrylics (Red Heart Super Saver and similar), and DK weight acrylics (mainly Paintbox DK). I wanted to keep them separate, so I put the worsted on the left and the DK on the right. Within each section, I put them in rainbow order because I like rainbows. I shoved some small leftover balls of yarn between the bigger cakes, to fill in the spaces.
I also wanted to use my yarn wall to hold some craft supplies, so as you can see, I mounted two pegboard baskets under the worsted yarn and various hanging items under the DK yarn. In the baskets are my jars of eyes (so creepy out of context!), stitch markers, and various other notions.
Finally, I’d had a vision from day one of incorporating my collection of Pride Flag Crochet Hearts into the yarn wall. I threaded one long piece of yarn between each heart, tied the yarn to hooks on either side of the pegboard, and voila! A Pride crochet banner.
In progress – I ran out of hooks so it was like this for a couple of weeks…
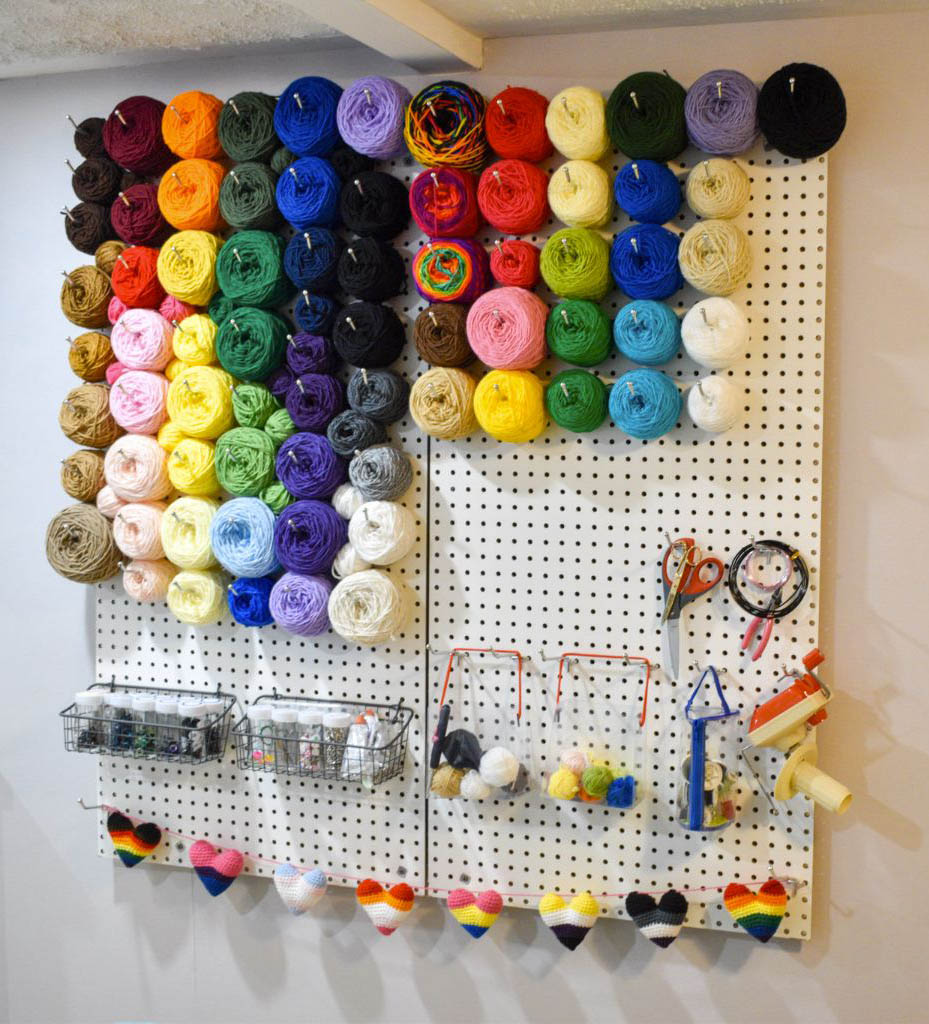
And complete!
And that’s it! What do you think? Are you excited to make your own yarn or craft wall? Drop a comment to let me know your thoughts, and to share your own projects!

© Wayward Pineapple Creations | Julia Simpson This post and all related images are copyright protected. You may link to this blog post, but please do not copy/paste, distribute, or alter the post and claim it as your own.
Menu
AFFILIATE DISCLOSURE
Wayward Pineapple Creations is a participant in the Amazon Services LLC Associates Program, an affiliate advertising program designed to provide a means for sites to earn advertising fees by advertising and linking to Amazon.com. If you use these affiliate links to make a purchase, I may earn a commission. As an Amazon Associate, I earn from qualifying purchases. Thank you.
5 thoughts on “Organize Your Yarn with this Awesome Pegboard Yarn & Craft Wall!”
You my friend have just fixed my year long pondering!!! My husband and I are planning on long term travel… I can’t go without my yarn but in a trailer, storage spaces are a premium… I’m showing this to my husband and where I’m thinking about putting it <3 thanks for sharing
That’s so great to hear! I’m glad I could help. 🙂 It’s definitely a great way to save space. I’d love to see a picture when you’re done!
Great idea. I have one question; How do you keep the dust off the yarn, any ideas for that?
Hmm good question. I haven’t had mine for long so no issues with dust yet. I suppose you could cover the wall in a plastic sheet? I’m not too worried yet, I used to have it stored in open shelves and tubs and never had dust issues, but I’ll definitely keep an eye on it. Hopefully it won’t be too bad!